
Want a rich, coffee-shop–style caramel flavor at home—without paying for bottled syrups or guessing at ratios? This caramel syrup for coffee recipe gives you a smooth, pourable syrup that melts perfectly into hot or iced coffee in minutes.
In This Article
ToggleI’ve burned sugar, over-thickened batches, and made syrup that seized into crystals. This version fixes all of that. It’s simple, predictable, and built specifically for coffee—not desserts.
Here’s exactly how to make caramel syrup that tastes clean, balanced, and barista-level, using pantry staples and one saucepan.
What Is Caramel Syrup for Coffee?
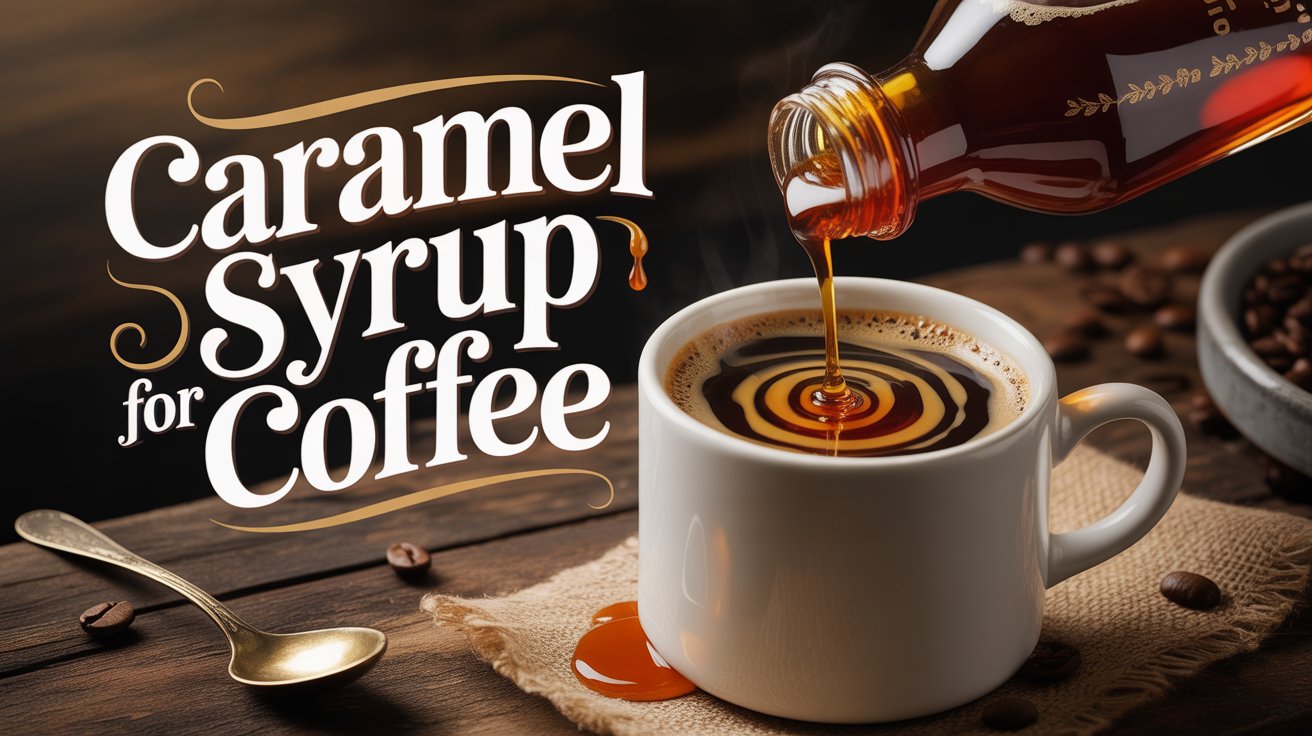
Short answer: it’s a thin, pourable caramel sweetener designed to dissolve instantly into coffee—hot or iced—without sinking, clumping, or overpowering the cup.
Caramel syrup is not caramel sauce. Sauce is thicker, richer, and built for desserts. It contains more fat and often heavy cream or butter, which makes it cling to spoons—and fight your coffee.
Caramel syrup, by contrast, relies on caramelized sugar (sucrose) and water. That chemistry matters. The lower viscosity lets it integrate cleanly into espresso, drip coffee, cold brew, and milk-based drinks without separation.
Syrup vs Sauce vs Simple Syrup (Clear the Confusion)
Most people mix these up. Here’s the practical difference that actually affects your coffee:
| Type | Texture | Best Use | Coffee-Friendly? |
|---|---|---|---|
| Caramel syrup | Thin, pourable | Sweetening drinks | Yes — dissolves instantly |
| Caramel sauce | Thick, creamy | Desserts, drizzle | No — sinks, coats, overpowers |
| Simple syrup | Thin, clear | Sweetening drinks | Yes — but no caramel flavor |
Simple syrup sweetens. Caramel syrup sweetens and adds depth, thanks to controlled caramelization—the stage where sugar develops complex flavor compounds without bitterness.
Why Homemade Beats Store-Bought
Bottled syrups optimize for shelf life, not flavor. That usually means stabilizers, artificial flavoring, and sweetness you can’t dial back.
Homemade gives you leverage:
Cleaner flavor: pure caramel notes instead of burnt sugar or synthetic vanilla.
Customization: control sweetness, salt level, and intensity.
Transparency: you know exactly what went into the pan—and your cup.
Once you taste caramel syrup made fresh, most commercial versions feel flat by comparison.
Why You Should Make This at Home
You get control—over taste, cost, and how far the syrup goes.
Coffee is sensitive. A few extra grams of sugar or a heavy-handed syrup can wreck balance. Making it yourself lets you tune the sweetness to your brew method, roast level, and milk choice.
Taste Control (The Real Advantage)
Light roast? Keep the syrup subtle to preserve acidity.
Dark roast or espresso? Push the caramel deeper for contrast.
You control the caramelization stage, which determines whether the flavor reads as honeyed, toffee-like, or boldly bittersweet.
Cost Reality Check
A single bottle of premium caramel syrup costs more than multiple homemade batches. Sugar and water cost cents per serving. The math favors DIY immediately.
More importantly, homemade syrup eliminates waste. You make what you’ll actually use—no half-empty bottles expiring in the fridge door.
Versatility Across Drinks and Desserts
This isn’t a one-use recipe.
Stir it into hot coffee without residue.
Blend it into iced coffee or cold brew—no sinking.
Use it in lattes, cappuccinos, or foam toppings.
Drizzle lightly over yogurt, oatmeal, or baked goods.
One saucepan. Multiple applications. Zero compromises.
If you drink coffee regularly and care about flavor consistency, making caramel syrup at home stops being a “nice-to-have” and starts feeling obvious.
Ingredients That Make the Best Caramel Syrup
The outcome you want is simple: a smooth, pourable caramel syrup that dissolves instantly into coffee without sinking, separating, or tasting burnt.
That result depends less on technique than most people think—and more on ingredient choice.
When you keep the formula lean and intentional, the syrup behaves exactly the way coffee demands.
Core Ingredients (Classic Coffee Syrup)
This recipe uses the barista-style caramel syrup model—no dairy, no thickeners, no fillers.
Sugar
The backbone. Plain granulated sugar caramelizes predictably and creates clean, bitter-sweet depth when heated correctly.Water
Controls texture and solubility. Water keeps the syrup thin enough to integrate into espresso and iced coffee.Vanilla (optional, but recommended)
Vanilla extract rounds off sharp caramel notes and adds aroma without masking coffee flavor.Salt (optional, for balance)
A small pinch enhances sweetness and cuts bitterness. This is flavor chemistry, not “salty caramel.”
Note: Butter and heavy cream belong in caramel sauce, not classic coffee syrup. Those variations come later—for now, we focus on a syrup that performs flawlessly in drinks.
Ingredient Notes & Smart Substitutions
Small ingredient swaps change flavor, texture, and even safety. Here’s what actually matters.
Sugar Types (What Works—and What Doesn’t)
| Sugar Type | Result | Recommendation |
|---|---|---|
| White granulated | Clean caramel, stable | Best choice |
| Cane sugar | Similar to white, slightly deeper | Excellent alternative |
| Brown sugar | Molasses flavor, less control | Not ideal for coffee |
Brown sugar introduces moisture and molasses solids. That can overpower coffee and increase crystallization risk.
Water Temperature (Safety Matters)
Cold or room-temperature water works best when added after caramelization. Hot water increases splatter risk and accelerates steam expansion.
This isn’t a flavor issue—it’s a burn-prevention issue.
Dietary & Vegan Considerations
This recipe is naturally dairy-free and vegan.
Stick with cane or beet sugar and avoid honey or dairy fats if dietary clarity matters.
Step-by-Step Recipe (Easy + Foolproof)
This process solves all three.
Preparation (Do This First)
Set yourself up for control.
Use a heavy-bottom saucepan to distribute heat evenly.
Keep a heat-resistant spatula or spoon nearby.
Measure ingredients in advance. Caramel waits for no one.
Safety note: Caramelized sugar exceeds the temperature of boiling water. Treat it with respect.
Cooking Instructions
Dissolve the sugar in water over medium heat.
Stir gently until the mixture turns clear. No rushing here.Bring to a steady simmer and stop stirring.
Let evaporation do the work. Stirring now encourages crystallization.Watch the color—not the clock.
The syrup will shift from clear to pale gold to amber.
Amber equals flavor. Dark brown equals bitterness.Carefully add the remaining water.
Stand back. The syrup will bubble aggressively as temperature equalizes.Stir in vanilla and salt, if using.
Remove from heat once fully combined. The syrup should pour easily.
This method prioritizes control over speed. That’s why it works consistently.
Cooling & Storage
Let the syrup cool in the pan for a few minutes, then transfer it to a heat-safe glass container.
Refrigerate once fully cooled.
Shelf life: up to 2 weeks when stored airtight.
If thickened after chilling, warm briefly and stir.
Properly made caramel syrup stays smooth, fluid, and coffee-ready—no reheating gymnastics required.
This is the version you’ll actually use every morning, not the one that hardens and gets forgotten.
Expert Tips to Nail the Perfect Syrup
If your goal is a syrup that stays smooth, dissolves instantly, and tastes clean in every cup, precision beats speed every time.
These tips come from repeat batches, failed batches, and the patterns that separate consistent results from sticky disasters.
Avoiding Crystallization (Do This, Skip That)
Crystallization happens when sugar molecules reattach and form solids. Once it starts, it spreads fast.
Do:
Dissolve sugar fully before simmering.
Stop stirring once the syrup heats up.
Keep the pan walls clean; stray sugar seeds crystals.
Don’t:
Stir after boiling begins.
Scrape hardened sugar back into the syrup.
Shock the syrup with cold utensils mid-cook.
A calm pan produces a stable syrup.
Common Mistakes That Ruin Caramel
Most failures come from impatience.
Burning sugar: Dark brown isn’t “richer.” It’s bitter. Pull at amber.
Hot water splatter: Caramel exceeds boiling temperature. Add water slowly and step back.
Over-reduction: Thick syrup cools into glue and refuses to mix with coffee.
Control heat. Respect temperature. Everything improves.
Adjusting Sweetness and Thickness
You don’t need a new batch to fix balance.
Too sweet: Add a splash of hot water and stir.
Too thin: Simmer briefly to reduce.
Too thick after chilling: Warm gently and loosen with water.
Think in small adjustments. Caramel is forgiving when handled early.
Texture Tips for Hot vs Iced Coffee
Coffee temperature changes how syrup behaves.
Hot coffee: Slightly thicker syrup adds body without heaviness.
Iced coffee: Thinner syrup prevents sinking and uneven sweetness.
If you make one batch for both, aim just thinner than you think you need. Cold thickens everything.
Variations — Flavor Boosters & Dietary Spins
Once you master the base, variations become strategic—not experimental.
Each option below keeps coffee compatibility front and center.
Salted Caramel Syrup
Salt doesn’t make syrup salty. It sharpens flavor contrast.
Add fine sea salt after cooking, not before.
Start with a pinch. Taste. Stop early.
The result reads smoother and deeper, especially in espresso and milk drinks.
Quick Simple Caramel Syrup (2 Ingredients)
This version trades complexity for speed.
Use sugar and water only.
Skip deep caramelization and stop at light amber.
You lose some depth, but gain reliability and minimal cleanup. Ideal for beginners or large batches.
Starbucks-Style Copycat Syrup
Coffee chains optimize for consistency.
Introduce corn syrup to stabilize texture.
Reduce slightly less to keep it pourable at fridge temperature.
The flavor skews sweeter and smoother, with less bitterness—designed to blend into milk-heavy drinks.
Dairy-Free and Vegan Options
Classic caramel syrup already fits most diets.
Use cane or beet sugar.
Avoid butter, cream, or honey.
Flavor with vanilla, salt, or spices instead.
The result stays clean, shelf-stable, and universally usable.
How to Use Your Caramel Syrup in Coffee Drinks
If the syrup is right, how you use it determines whether your coffee tastes balanced or flat.
These guidelines focus on extraction, temperature, and texture—because caramel behaves differently in hot, cold, and milk-based drinks.
Hot Coffee (Drip, Pour-Over, Americano)
Start light. Caramel amplifies bitterness if overused.
Baseline: 1–2 teaspoons per 8 oz cup
Stir while coffee is hot to fully integrate aromatics.
Pair best with medium or dark roasts, where caramel notes reinforce cocoa and nut flavors.
I add syrup before the final stir. That small habit distributes sweetness evenly without muting aroma.
Cold Brew and Iced Coffee (No Clumping)
Cold temperatures thicken syrup and slow dissolution.
Add syrup before ice, not after.
Use a slightly thinner consistency than hot-coffee syrup.
Shake or stir aggressively for full dispersion.
This prevents syrup from sinking and creating uneven sweetness at the bottom of the glass.
Lattes, Cappuccinos, and Sweet Foam
Milk changes everything. Fat carries caramel flavor further.
Add syrup to the cup first, then pour espresso over it.
Steam milk separately to avoid scorching sugars.
For sweet foam, mix syrup into cold milk before frothing.
Salted caramel shines here. The salt tightens sweetness and keeps milk drinks from tasting sugary.
Latte Art and Custom Drinks
Caramel syrup works best under the crema, not on top.
Use syrup sparingly to preserve foam structure.
For a salted caramel latte, keep the syrup light and finish with microfoam, not whipped cream.
Good syrup supports the drink. It never dominates it.
Homemade vs Store-Bought Caramel Syrup
This decision comes down to control versus convenience.
Here’s how they actually compare in the cup.
| Factor | Homemade | Store-Bought |
|---|---|---|
| Flavor | Clean, customizable | Consistent, often sweeter |
| Ingredients | Sugar, water, optional flavor | Stabilizers, preservatives |
| Cost per serving | Very low | Higher over time |
| Flexibility | Fully adjustable | Fixed profile |
Taste Profile Differences
Homemade syrup leans nuanced—bittersweet, aromatic, adjustable.
Commercial syrup prioritizes uniform sweetness and shelf stability.
If you drink milk-heavy beverages, store-bought can work. If you drink espresso or black coffee, homemade wins.
Cost and Ingredients Reality
One batch of homemade syrup costs a fraction of a single bottle and avoids thickeners or artificial flavoring.
You trade a few minutes of cooking for long-term control.
When Store-Bought Makes Sense
If time is tight or consistency matters more than customization, premium commercial syrups deliver reliable results.
Just expect more sweetness and less depth.
Common Mistakes & How to Avoid Them
Most caramel problems repeat for the same reasons.
Fix the habit, and the problem disappears.
Burning Sugar (Bitter Syrup)
Dark brown equals burned. Amber equals flavor.
Watch color, not time.
Pull early. Residual heat continues cooking.
Syrup Too Thin or Too Thick
Texture issues come from reduction, not failure.
Too thin? Simmer briefly.
Too thick? Add warm water and stir.
Caramel is adjustable—if you act early.
Safety with Hot Sugar
Caramel runs hotter than boiling water.
Add water slowly.
Keep distance.
Never pour hot caramel onto cold surfaces.
Respect the heat and the process stays stress-free.
Crystallization Signals and Fixes
Cloudiness or graininess signals sugar seeding.
Stop stirring once simmering begins.
Clean pan sides during cooking.
Reheat gently with water to dissolve crystals.
Stable syrup starts with calm technique.
Master these details and your caramel syrup stops being a gamble—and starts becoming a reliable part of your coffee routine.
FAQ
How long will my homemade caramel syrup last in the fridge?
Homemade caramel syrup typically stays good for 3–6 weeks in a clean, airtight container when refrigerated. Always check for off smells, mold, or texture changes before use.
Can I use caramel syrup in iced coffee without it clumping?
Yes. Caramel syrup dissolves best when added before ice and stirred well; cold drinks slow dissolution, so vigorous mixing helps avoid clumps.
Why did my caramel syrup crystallize, and what do I do?
Crystallization usually happens from stirring too early or impurities. Avoid stirring once sugar dissolves and use clean tools; if it crystallizes, gently heat with a little water until smooth.
What’s the difference between caramel syrup and caramel sauce?
Caramel syrup is thinner and designed to mix into drinks smoothly, while caramel sauce is thicker and richer, meant for drizzling on desserts.
How much caramel syrup should I add to my coffee?
Start with 1–2 tablespoons per 8-ounce cup and adjust to taste; less for subtle sweetness, more for richer caramel flavor.
Conclusion
Making your own caramel syrup transforms your coffee routine. You’ve learned how to craft a smooth, pourable syrup that dissolves perfectly in hot drip coffee, cold brew, lattes, or cappuccinos—without clumping, burning, or over-sweetening. By controlling ingredients, sweetness, and texture, you elevate every cup while avoiding the artificial flavors and preservatives found in store-bought bottles.
Whip up a batch today and elevate your daily coffee into a café-quality experience you can enjoy at home.

Shahriar brings a unique blend of storytelling prowess and digital expertise to Daily Coffee Guide. With a background in SEO and content strategy, he ensures our articles on Beans, Coffee, Tea, and Drinks are both engaging and discoverable. His passion for coffee culture drives him to explore and share the rich narratives behind every cup.